Arduino Based Big 12 Hours Digital Led Clock Making
Hello Friend, Today I Am Going to Show You How to Make a Big Led Digital Clock at Home Using Arduino/Atmel Microcontroller (atmega8a, Atmega328p… ) So Let’s Start…
-: Component List :-
1. Atmega8a/Atmega328p
2. Led (I Am Using 128 LEDs)
3. Male & Female Header
4. Plastic or Plywood
5. Heat Shrink Tube
6. 28 Pin Ic Base
7. Dot Print Pcb
8. Some Wire
9. Hot Glue
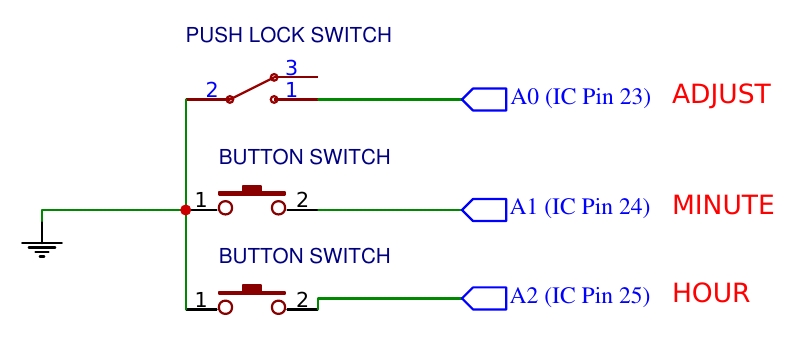
10. Push On-Off Switch (1 Pcs)
11. Push Button Switch (2 Pcs)
12. Micro USB Socket
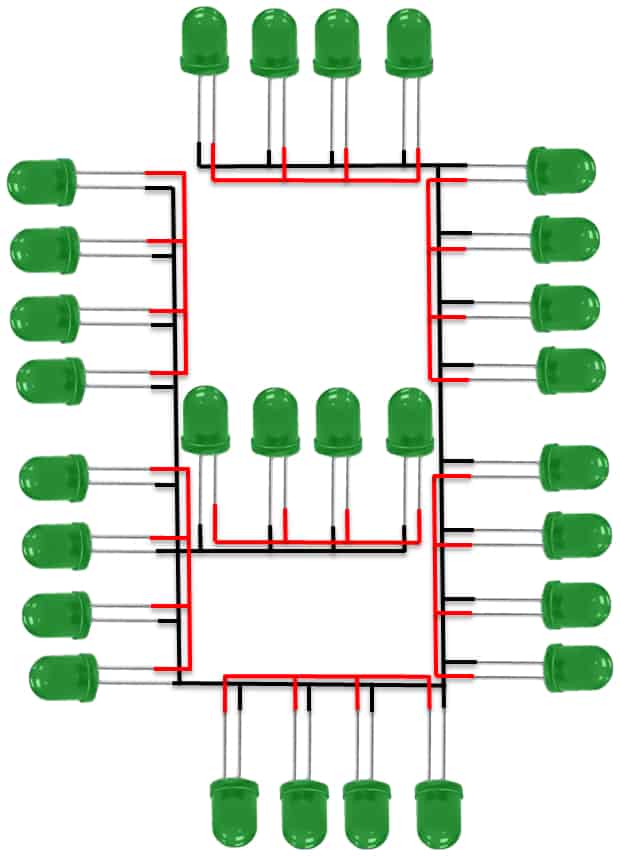
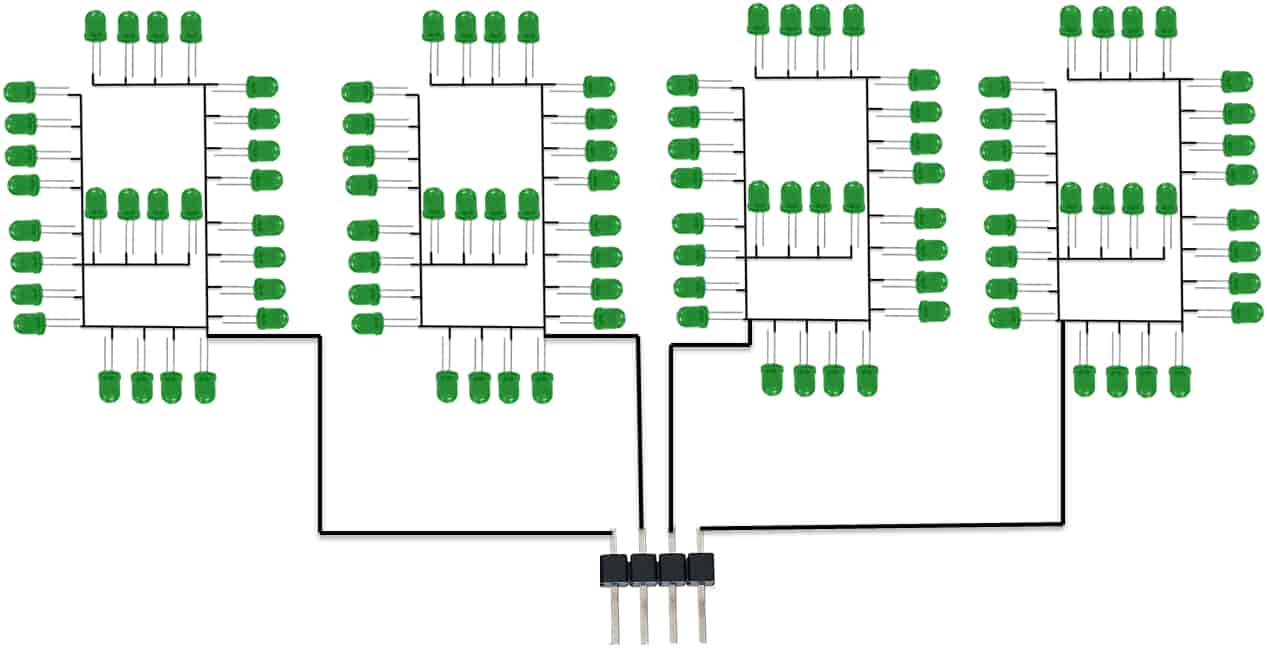
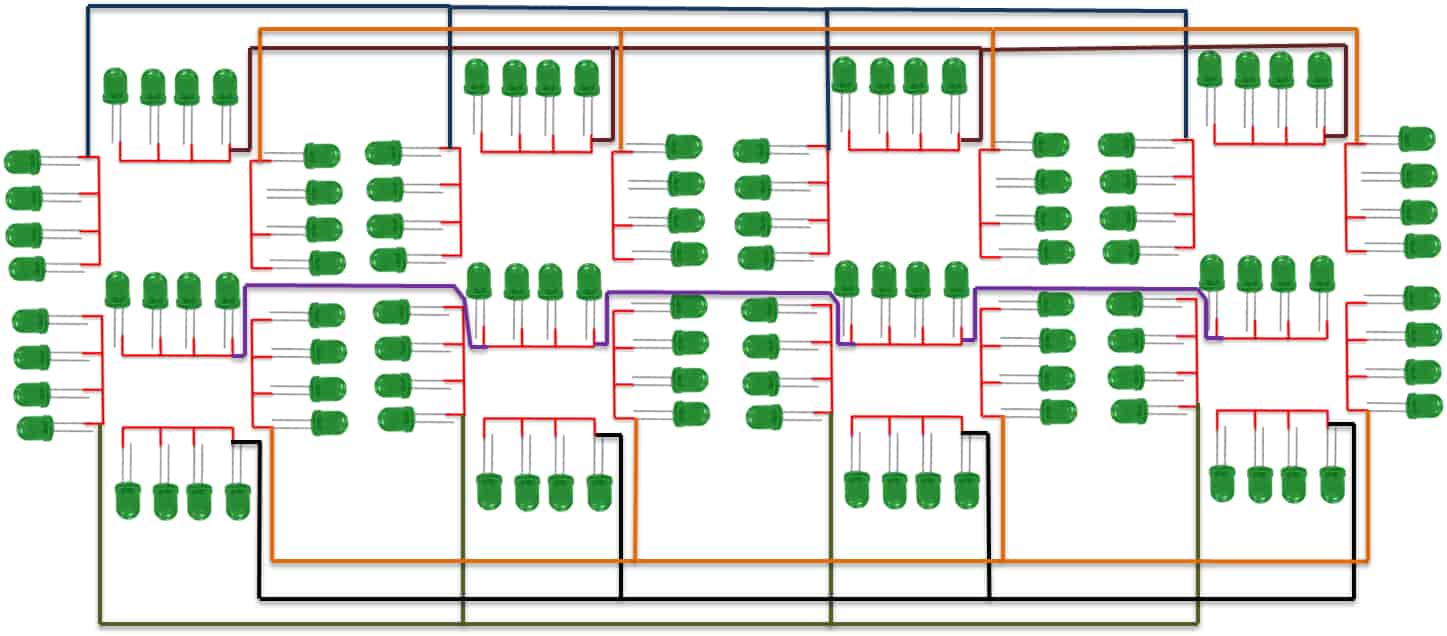
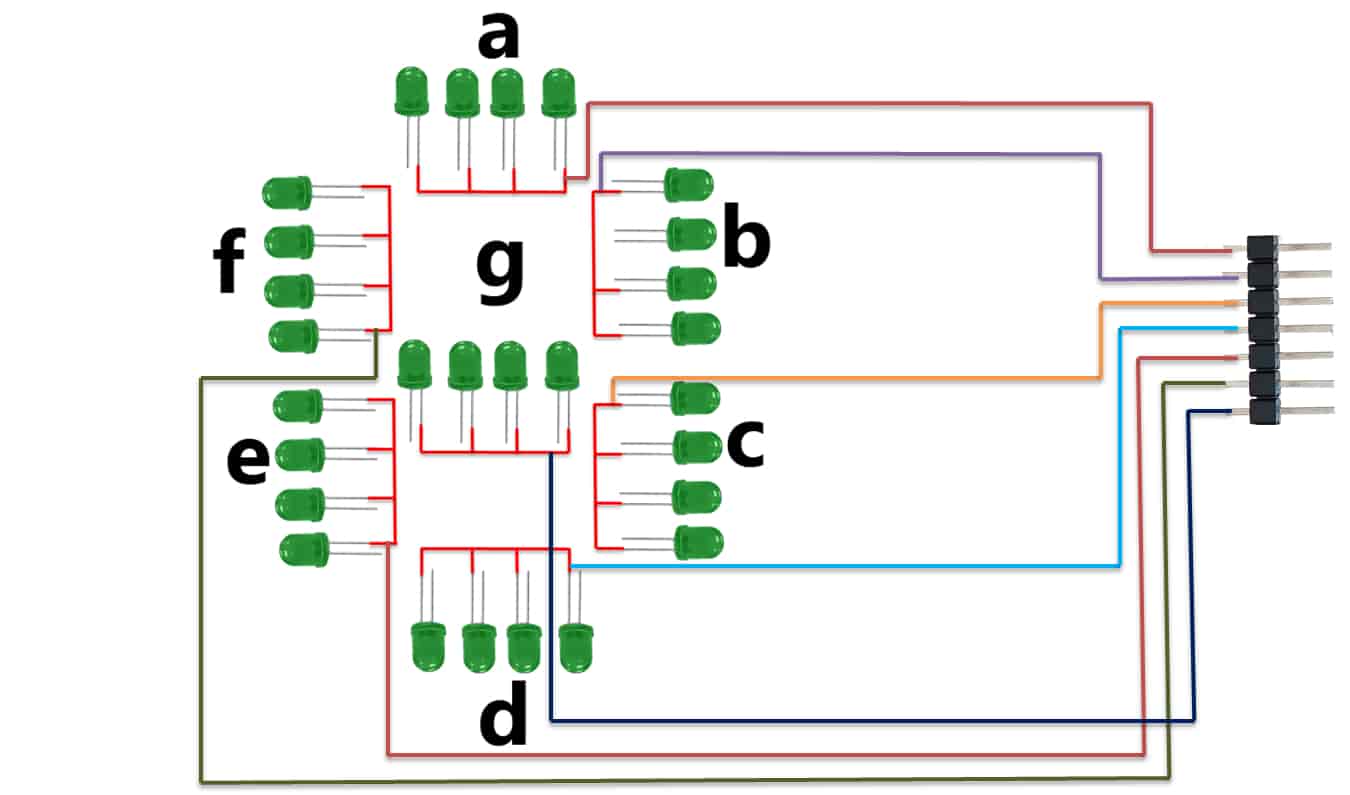
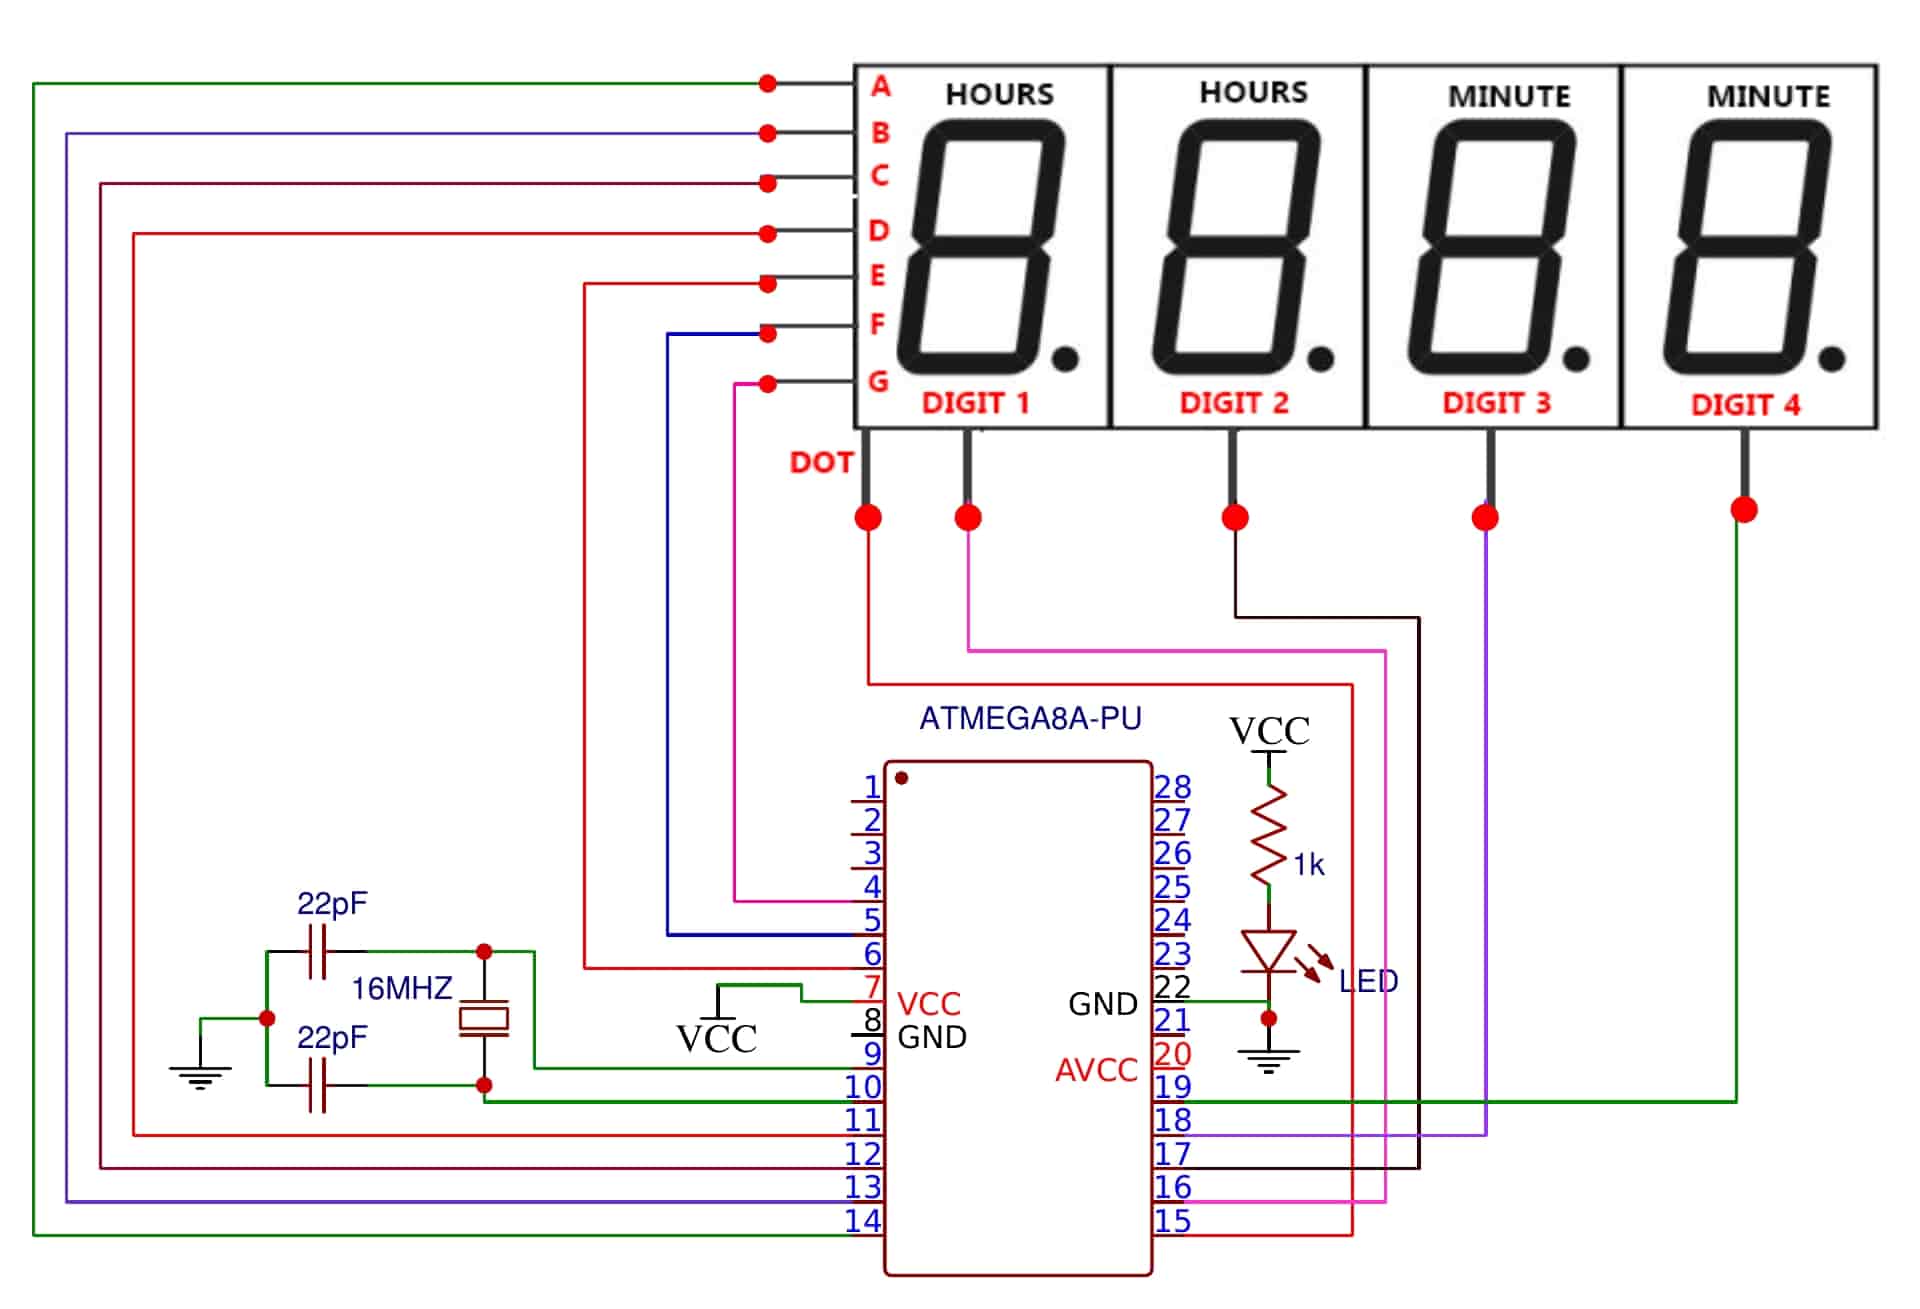
First Step — Making 4-Digit Led Display
MAKE COMMON ANODE DISPLAY(CODE WORK ON COMMON ANODE)
Single Digit Connection , Need Same 4 Digit like this.
All Wire Connection and How to Programme Step by Step Video Tutorial
-:Arduino Code :-
First Add “Time Master” Library in Arduino Library Folder
-:How to Add Any Arduino Library :-
Open ‘C’ Drive -> Then Open ‘Program File (X86)’ –> Then Open ‘Arduino’ Folder –> Open ‘Library’ Folder, and Finally Post Hare Arduino Time Master Library Done!


